Get Up and Running with FPGAs in Rancher Kubernetes Clusters
In this lab, we will lay out the absolute easiest way to begin using FPGA resources in Kubernetes clusters. To really simplify things, we will describe the process for enabling FPGAs in terms of the Rancher user interface. The Rancher UI is simply a client to the Rancher RESTful APIs. You can use other clients to the APIs, such as Golang, Python and Terraform, in GitOps, DevOps and other automated solutions. We won’t delve into any of those here.
Fundamentally, the process is simple:
- Build out your infrastructure for a Kubernetes cluster
- Install Kubernetes
- Install the fpga-operator via Helm
Getting Up and Running with Rancher and Available FPGA Resources-
Rancher is a multi-cluster management solution that spawns Kubernetes instances using either local or cloud resources. Recently, Amazon AWS and Microsoft Azure made available FPGA instances to the public in order to leverage the needs for application acceleration.
On the other hand, InAccel has developed an fpga-operator that is compatible with all the available FPGAs in the Cloud, including Intel and Xilinx ones. The fpga-operator performs the following:
- Installs the right FPGA drivers
- Instantiates the InAccel CSI and Device Plugins
- Deploys and starts InAccel Coral Resource Manager and Coral Monitor
FPGA drivers-
InAccel performs all the checks required to install the right drivers for each specific OS type and version.
CSI and Device plugins-
InAccel has developed a Device plugin based on the Kubernetes standard, that works for all FPGA devices and is able to announce and keep track of all the FPGAs of a cluster. It has also developed a CSI plugin that eases the deployment of FPGA accelerated pods by performing any required actions regarding volumes that have to be mounted etc.
Coral Resource Manager and Monitor-
InAccel Coral is the framework that manages, orchestrates and scales FPGA resquests accross a cluster of available FPGA resources. InAccel Coral Monitor is the tool for visualizing the state of each FPGA including structural information (temperature, power etc.) as well as information about its current configuration (loaded bitstream, number and name of the kernels, memory connections and usage, execution time for each accelerated request etc.).
Prerequisites-
Here is the bill of materials (BOM) for getting up and running with FPGAs in Rancher:
- Rancher
- InAccel FPGA Operator
- Infrastructure - we’ll use FPGA nodes on AWS
There is plenty of documentation to set up an HA installation of Rancher, so we will assume you already have Rancher installed.
Process Steps-
Install a Kubernetes cluster with FPGAs-
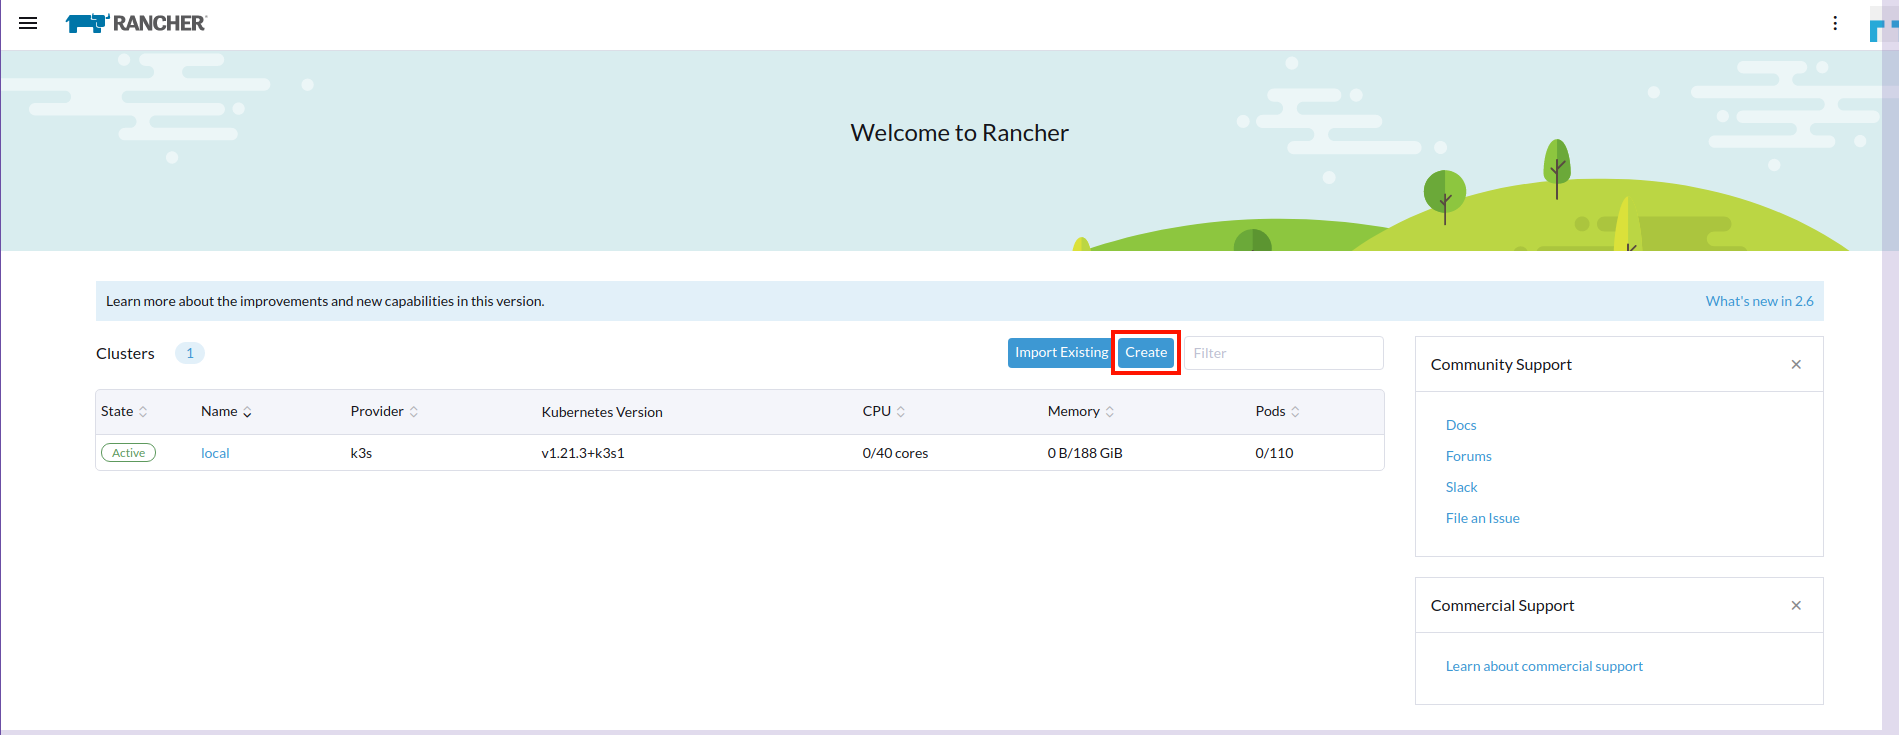
With Rancher installed, we will first build and configure a Kubernetes cluster (you can use any cluster with FPGAs.)
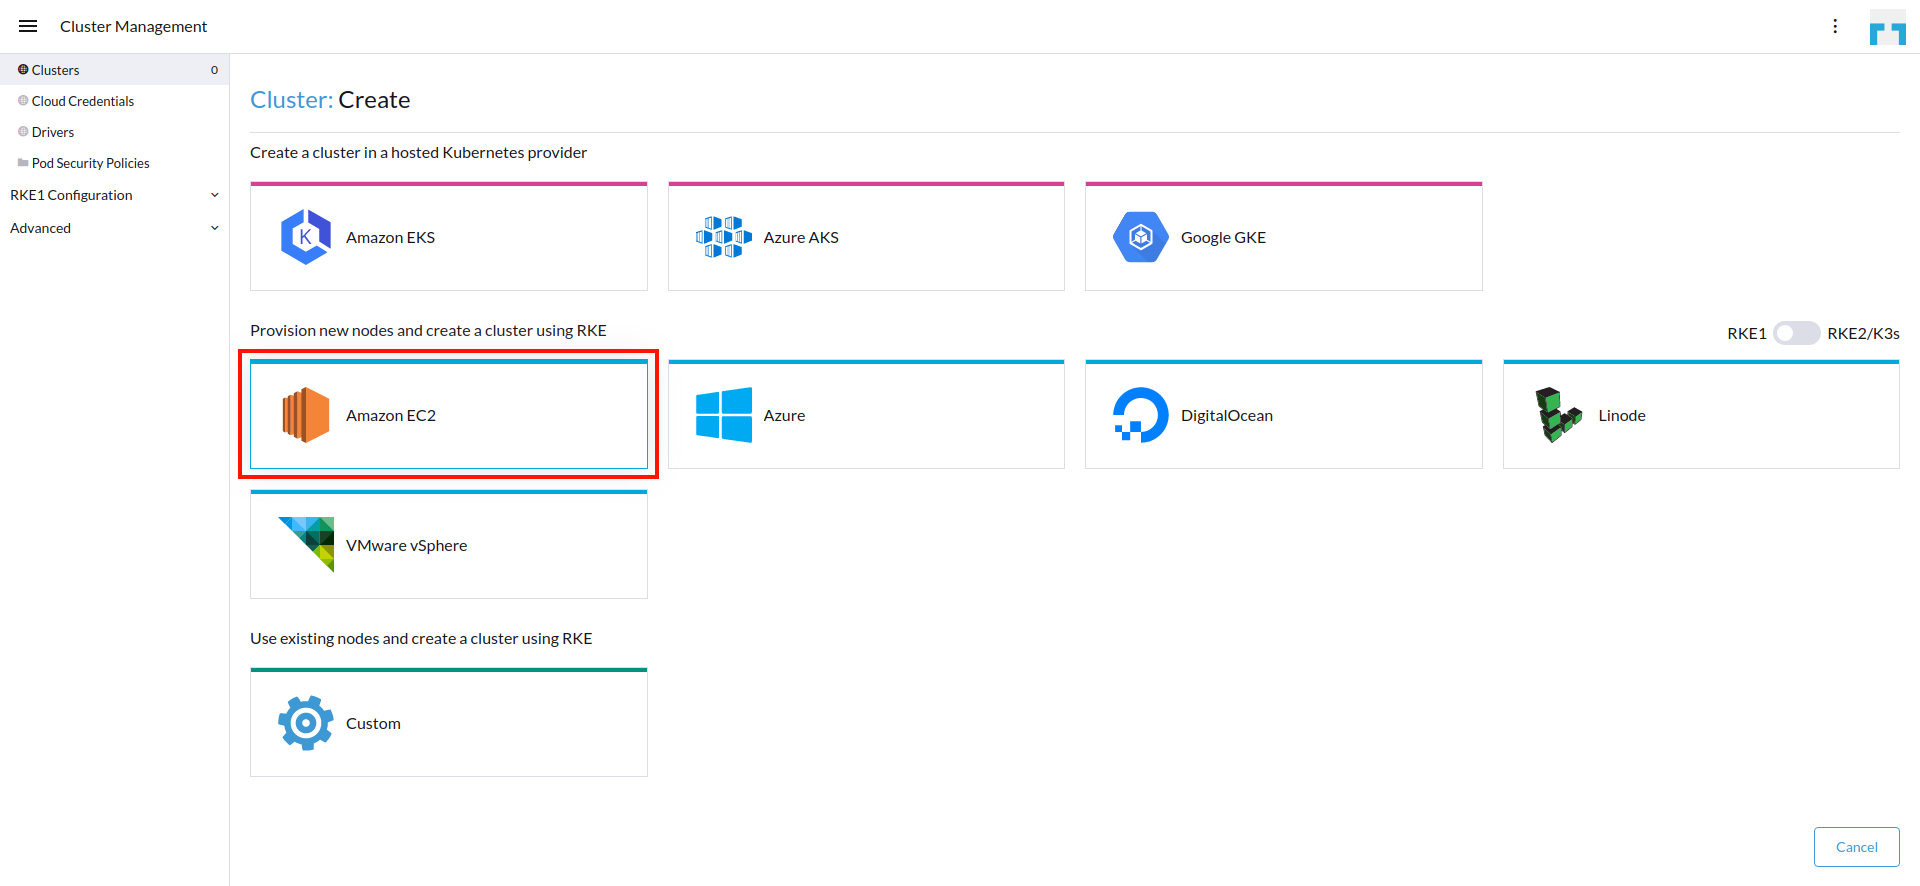
Under the Global context, we select Add Cluster and under the section "With RKE and new nodes in an infrastructure provider," we select the Amazon EC2 provider.
Right after, we are going to create two node pool templates: one for the master nodes and one for the worker ones. To do so, we select the plus icon (+) under the Template column.
The template for the master nodes is the following:
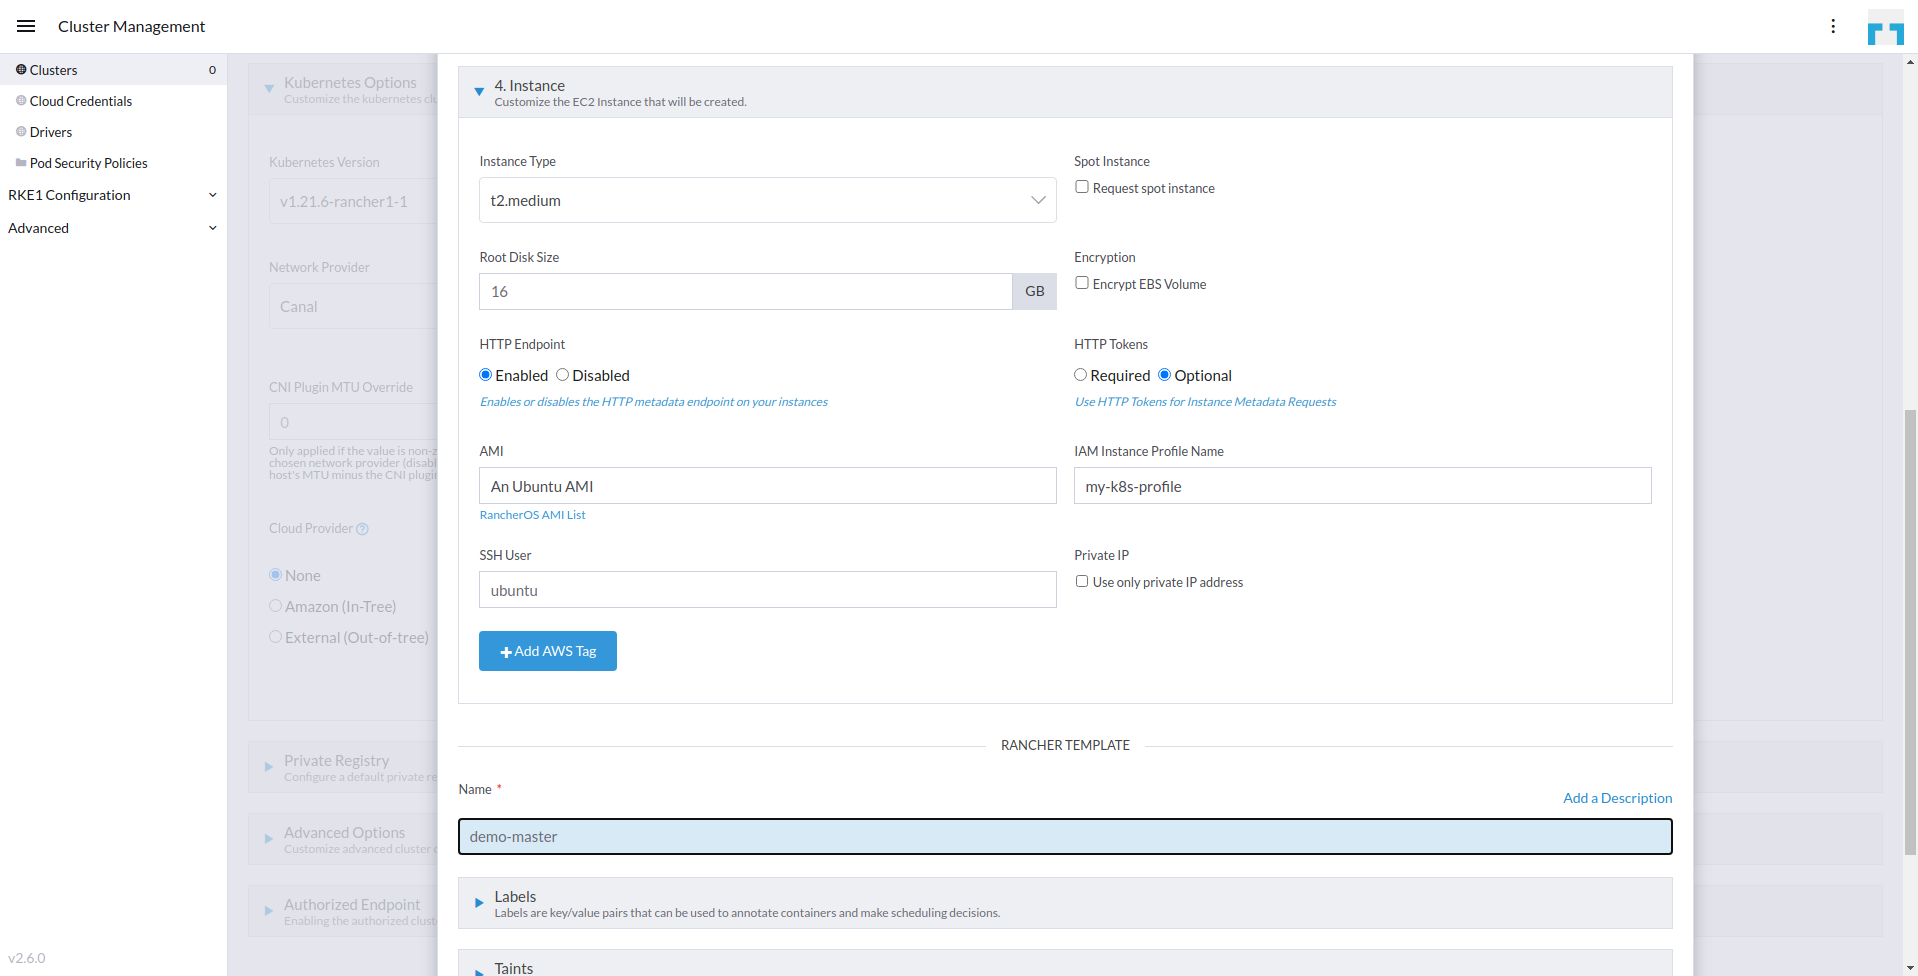
The template for the worker nodes (FPGA instances) is the following and is based on the f1.2xlarge machine type that comes with a VU9P Xilinx FPGA device. We do NOT need to specify a custom AMI with pre-installed FPGA drivers or tools, since our FPGA Operator will take care of the whole system setup:

After we have finished creating the two templates we specify the nodes that will be spawned. We choose to spawn one master and one worker node for this tutorial, as shown below:
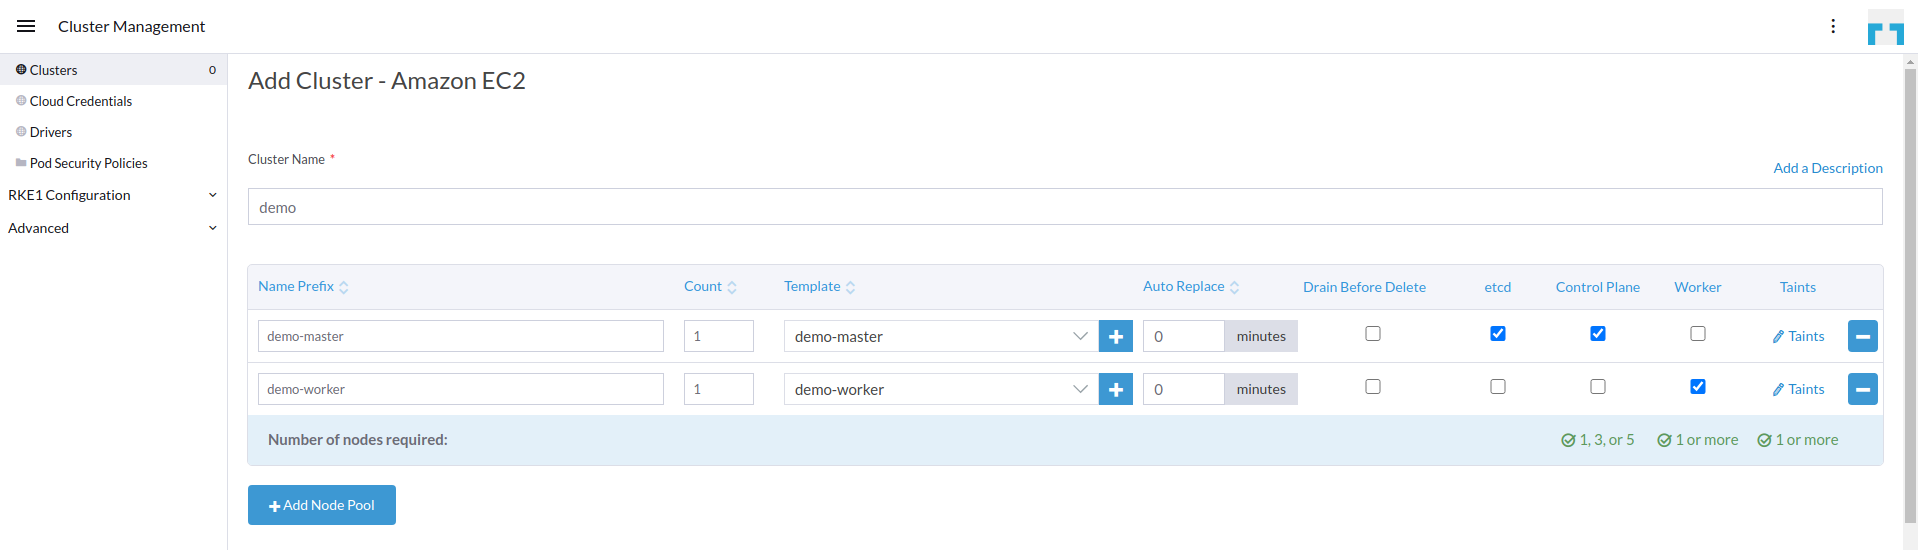
We left all other options set to the defaults. After a couple of minutes the cluster is up and running.

Set Up the FPGA Operator-
It is time to setup a catalog in Rancher using the FPGA Operator repository.
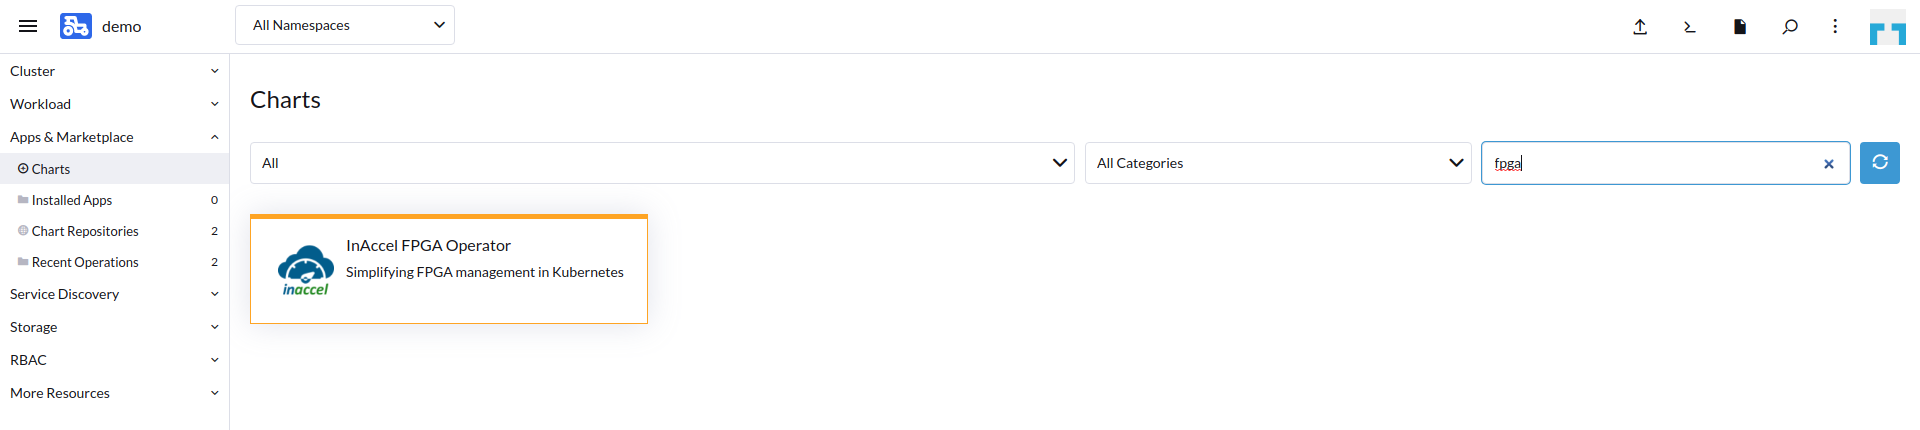
Using the Rancher Apps & Marketplace menu, we search for the FPGA Operator chart.
Selecting the chart, we can get more information on the chart itself as well as the default configuration and the values that can be configured.
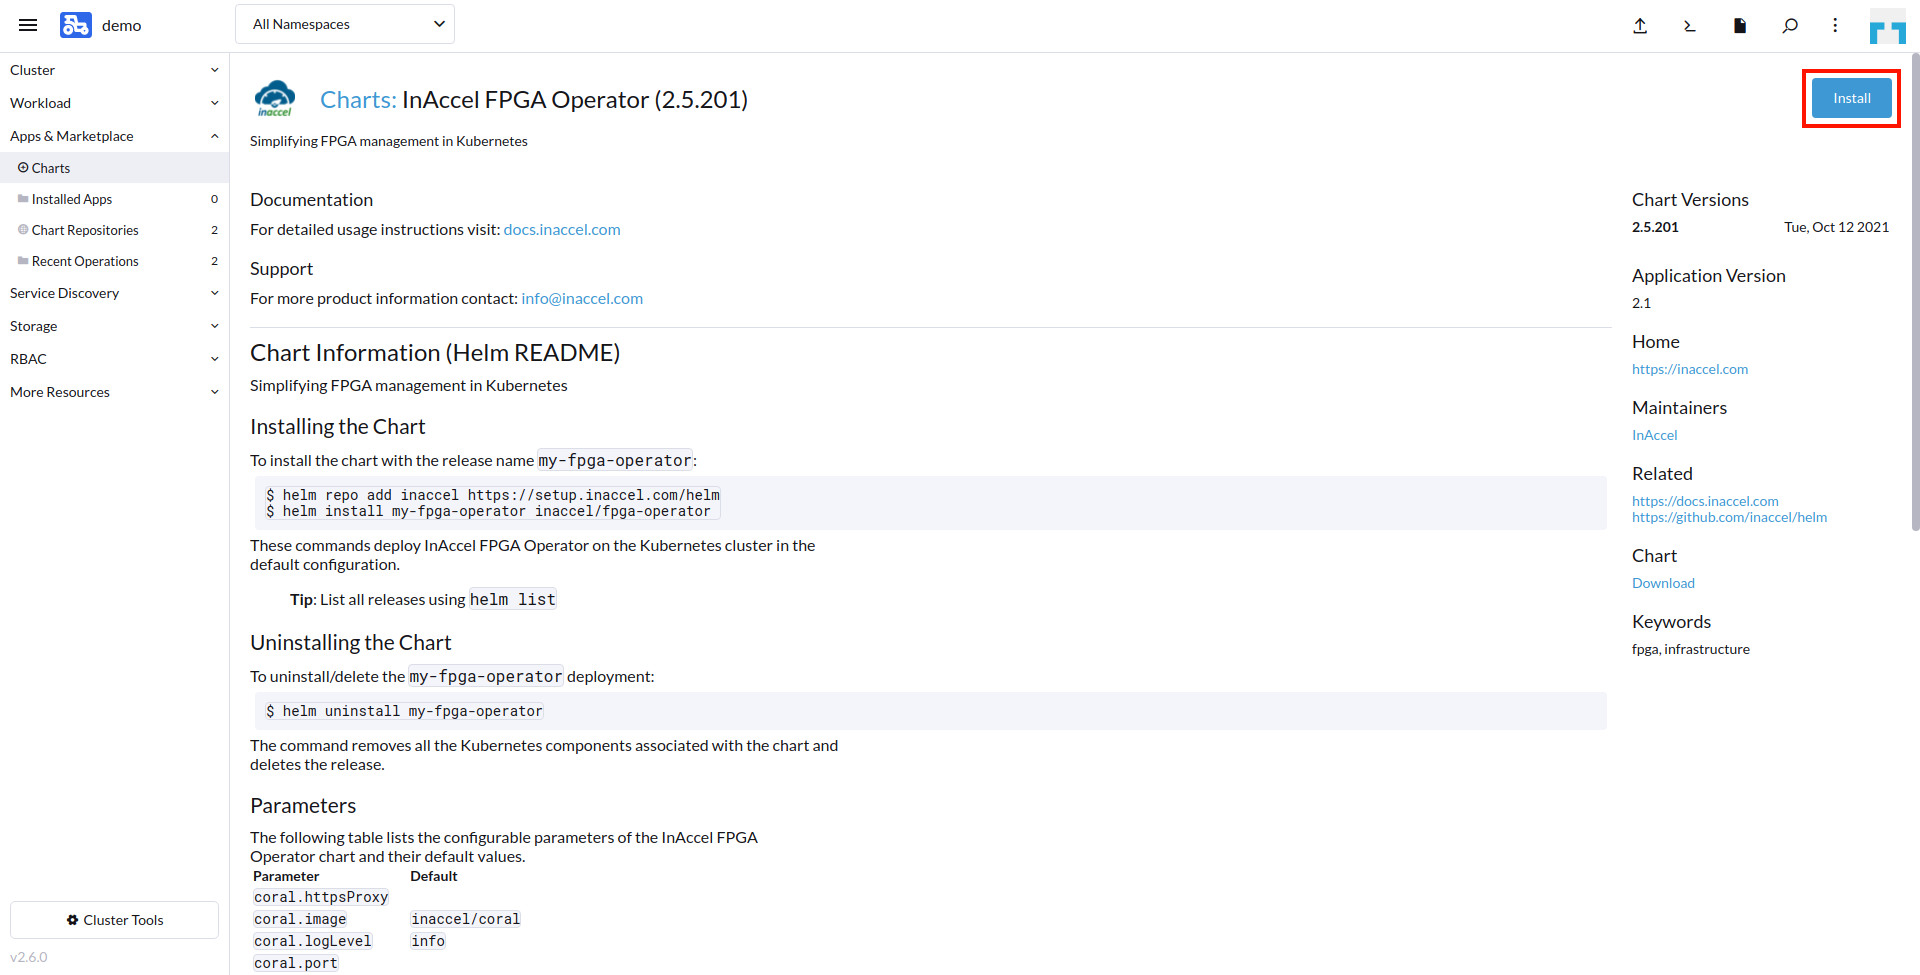
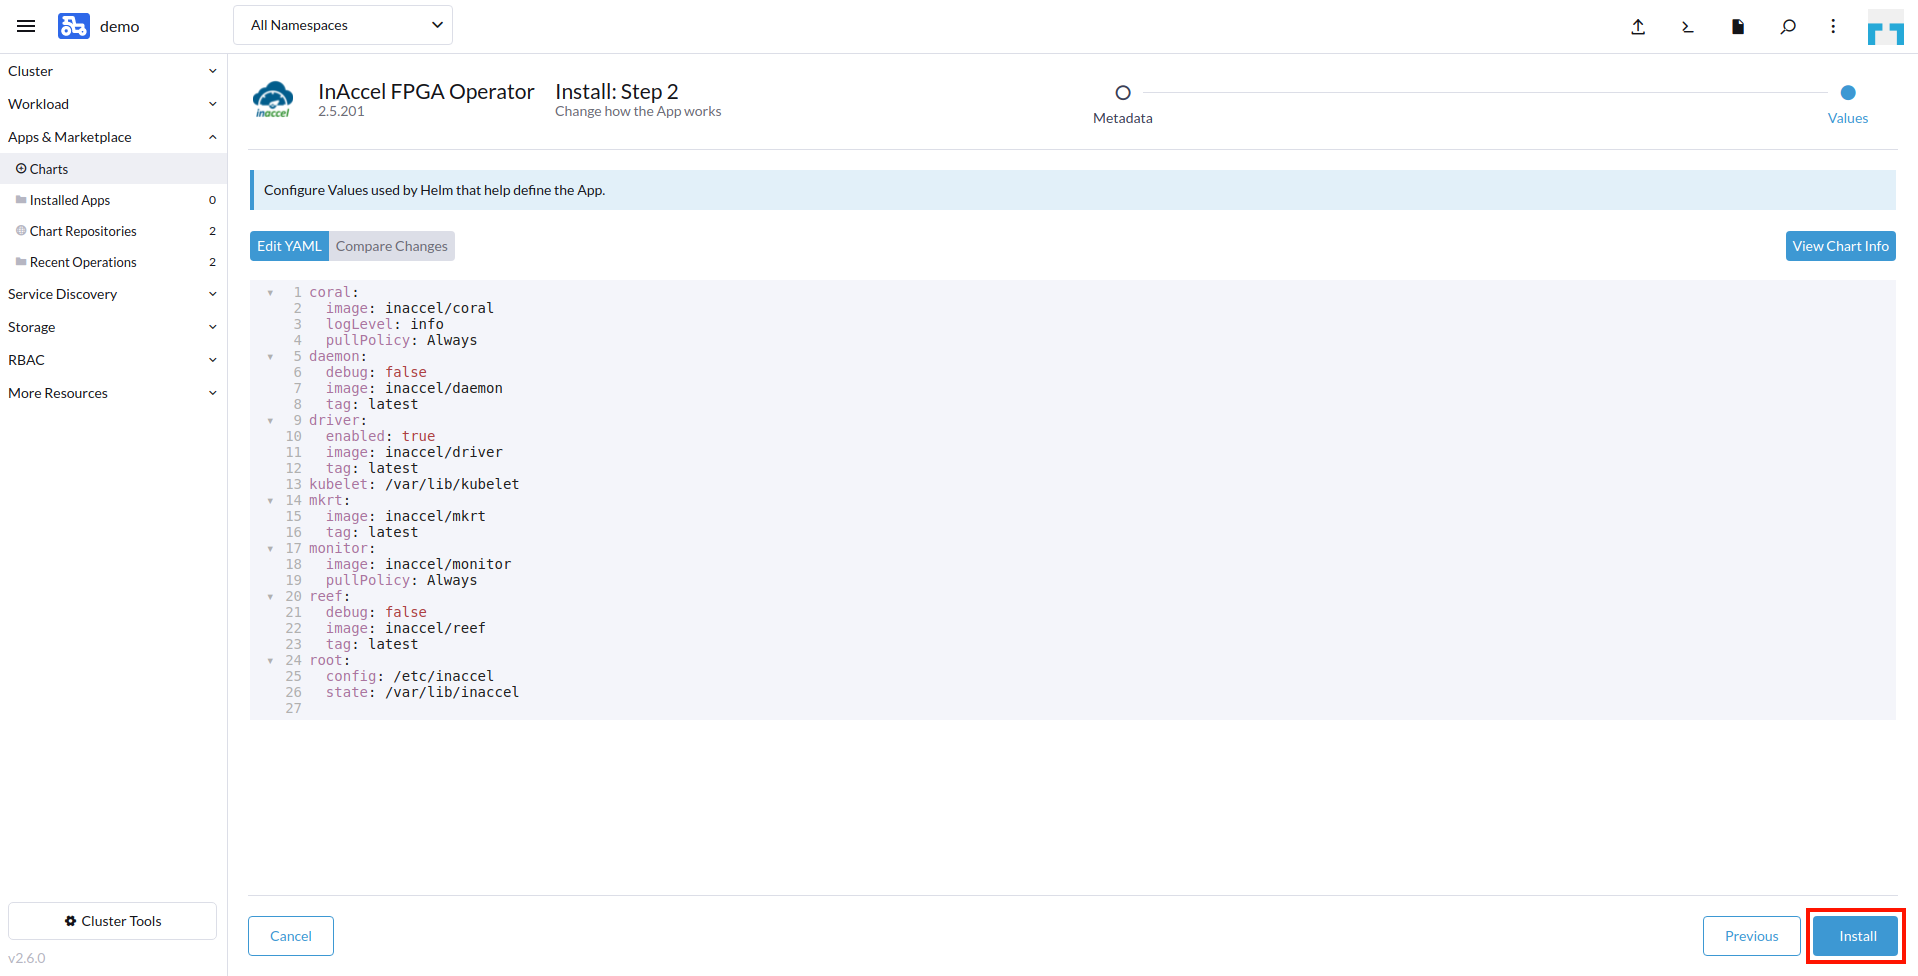
We select Install. We don't have to specify something in steps 1 and 2 so we just proceed by selecting the Next and Install buttons respectively.

After a few moments the application is successfully deployed.
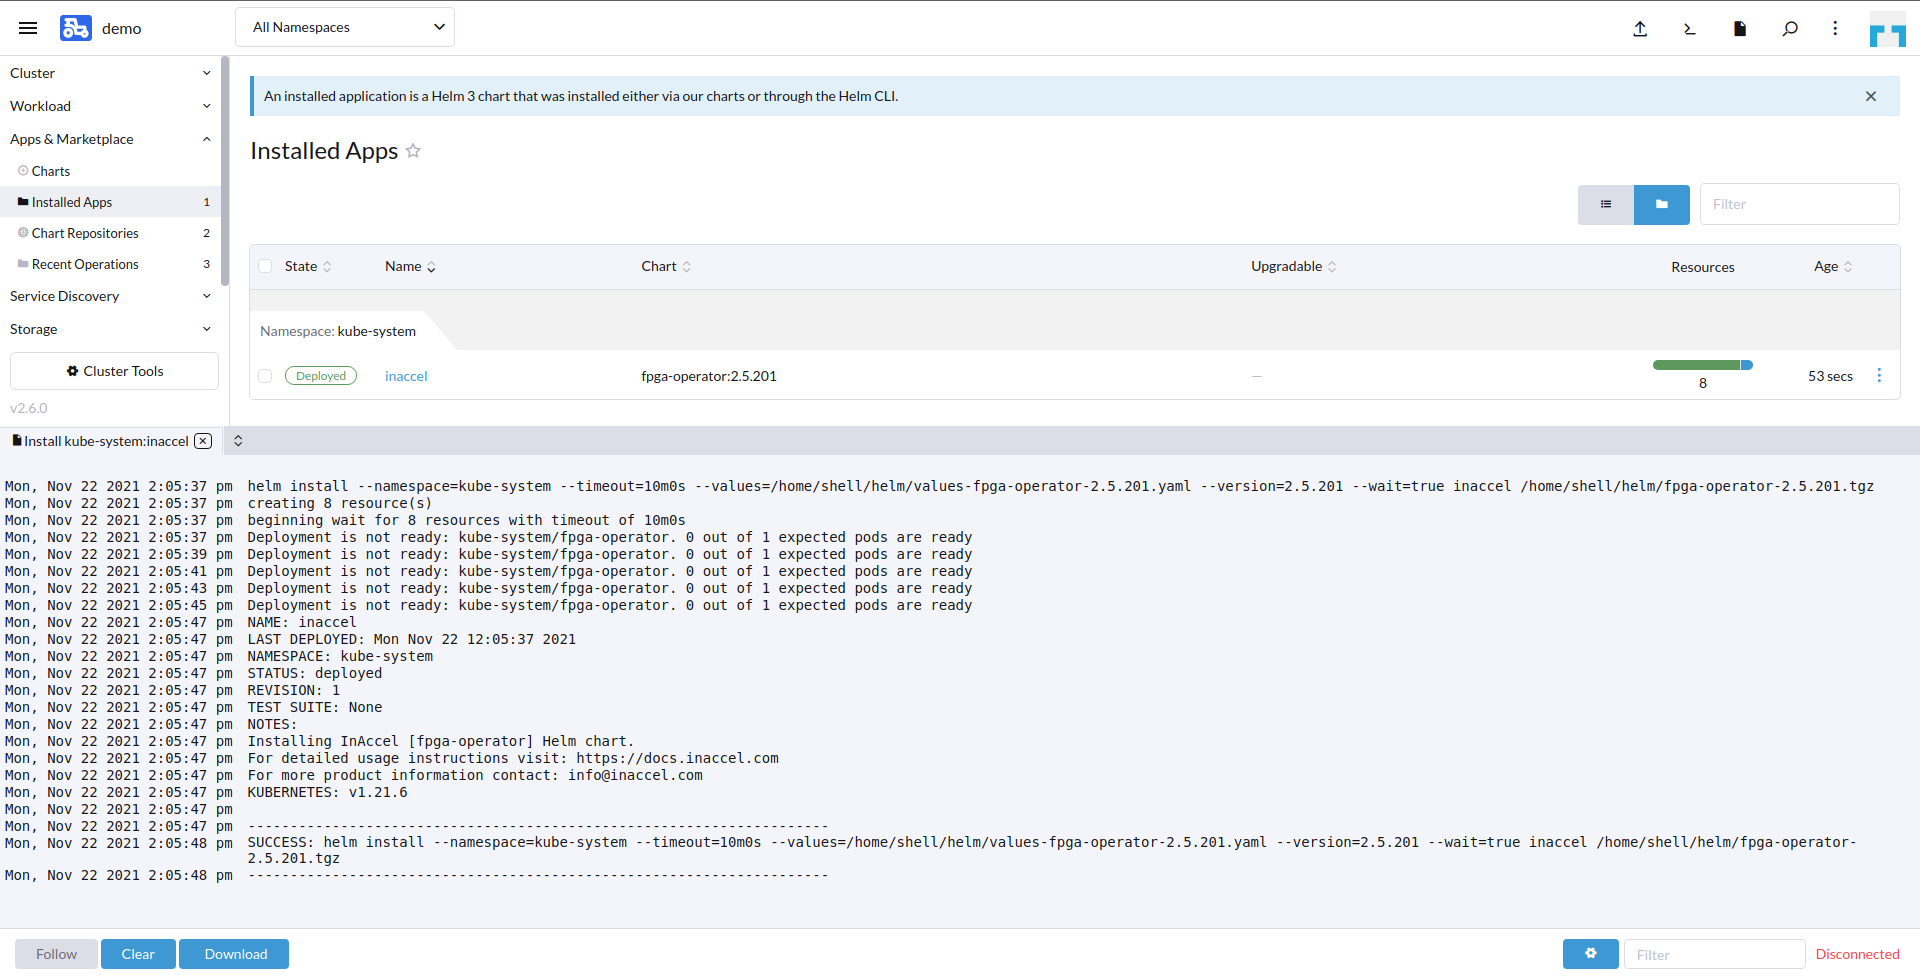
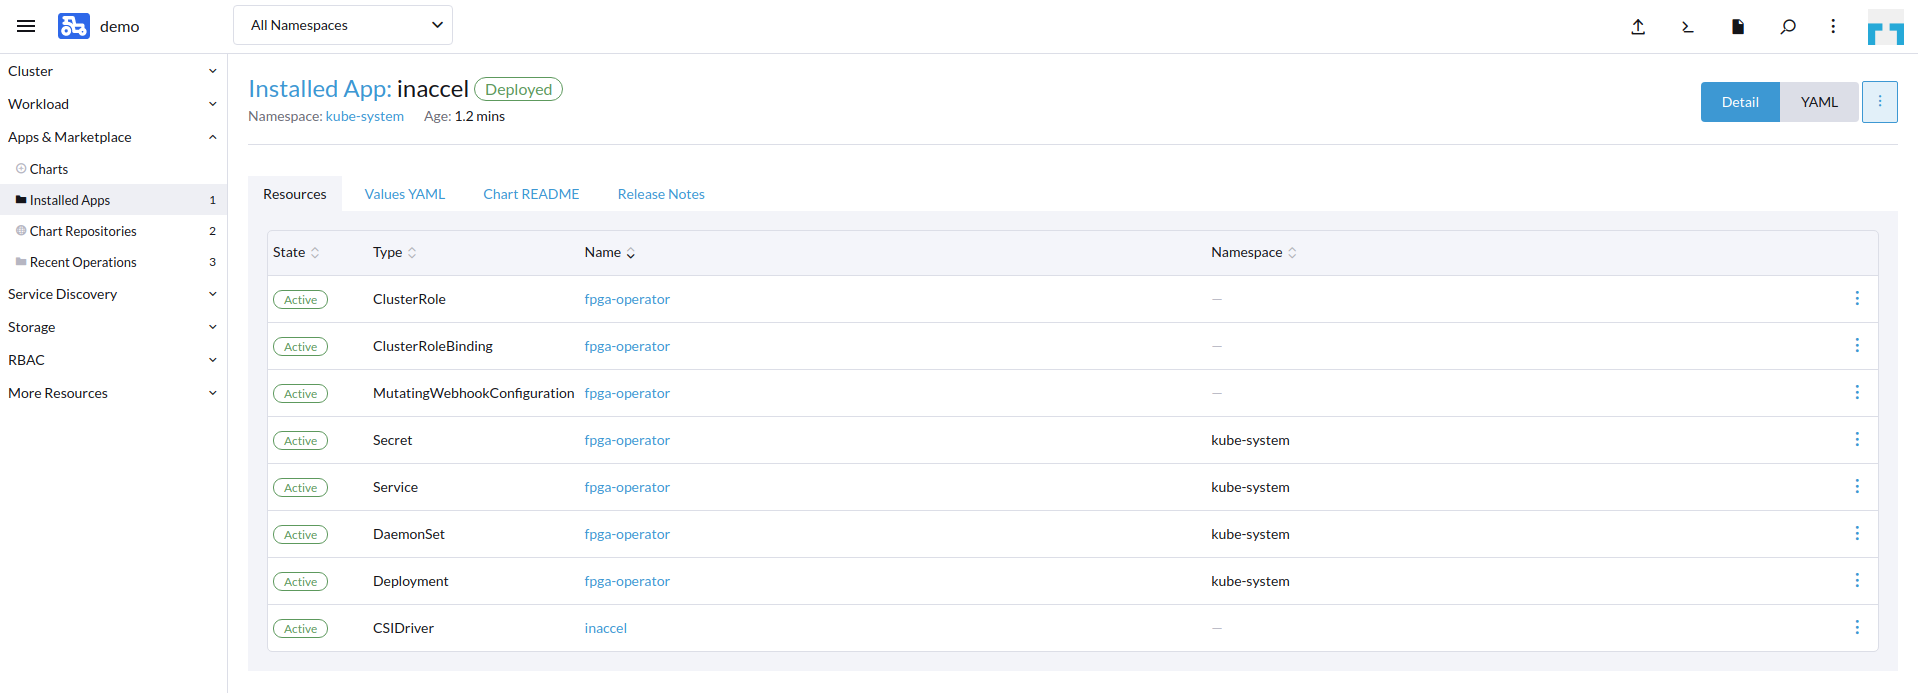
To get more information on the components deployed we can select the application name.
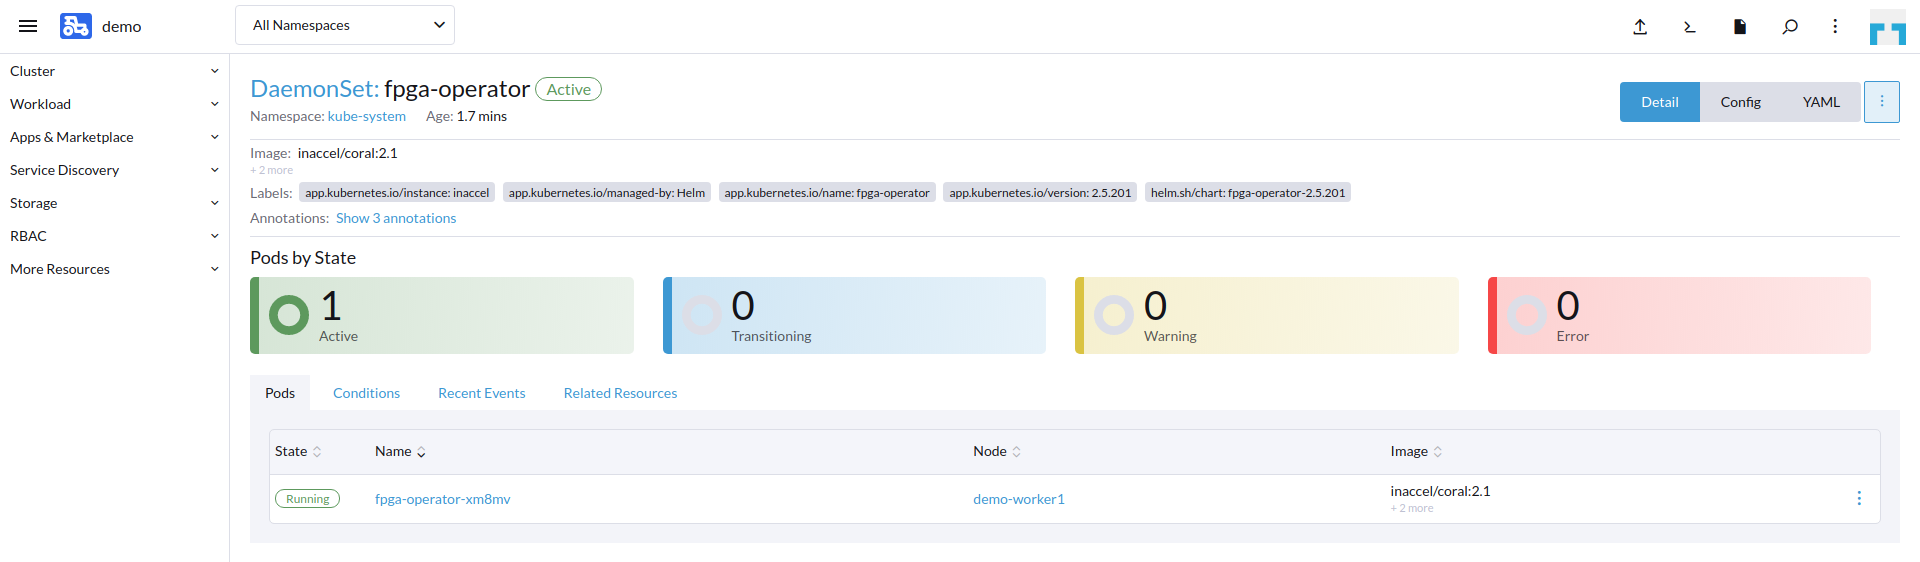
To view the pod that InAccel FPGA Operator DaemonSet has deployed we select the name right to the DaemonSet property.
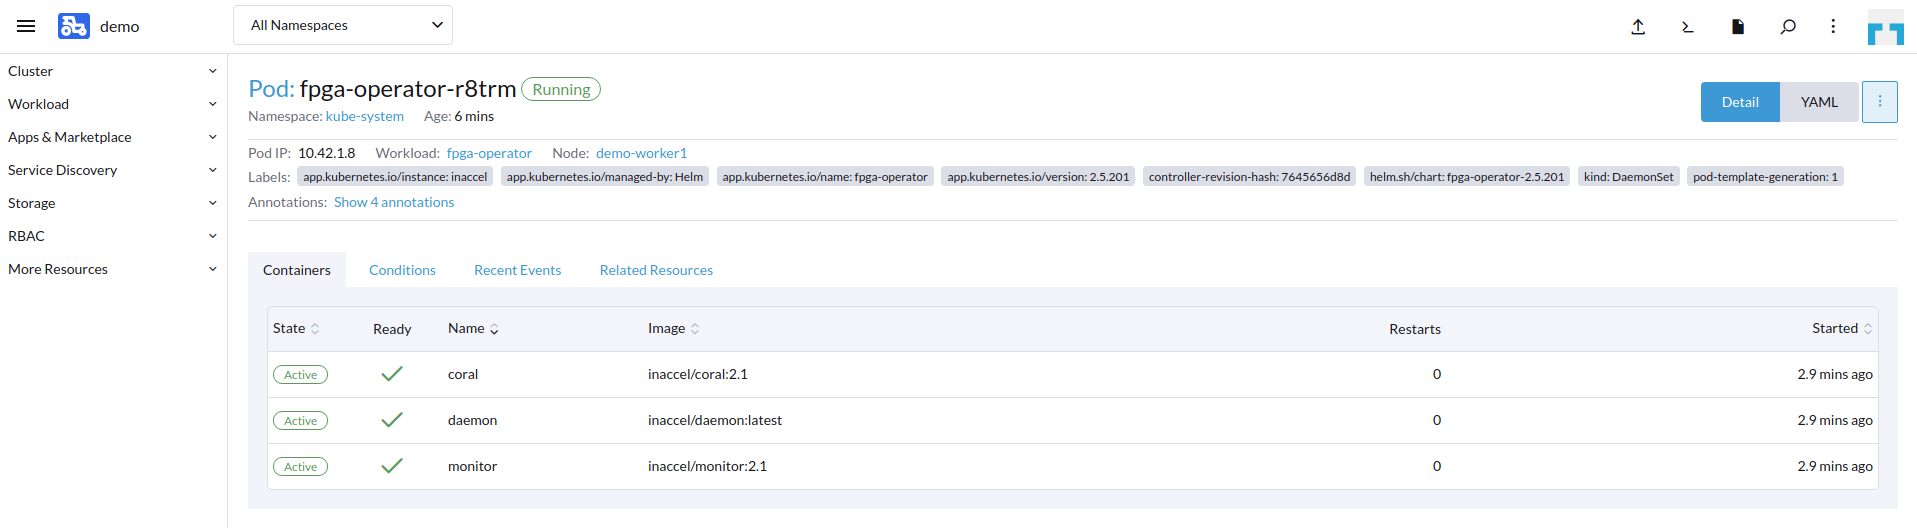
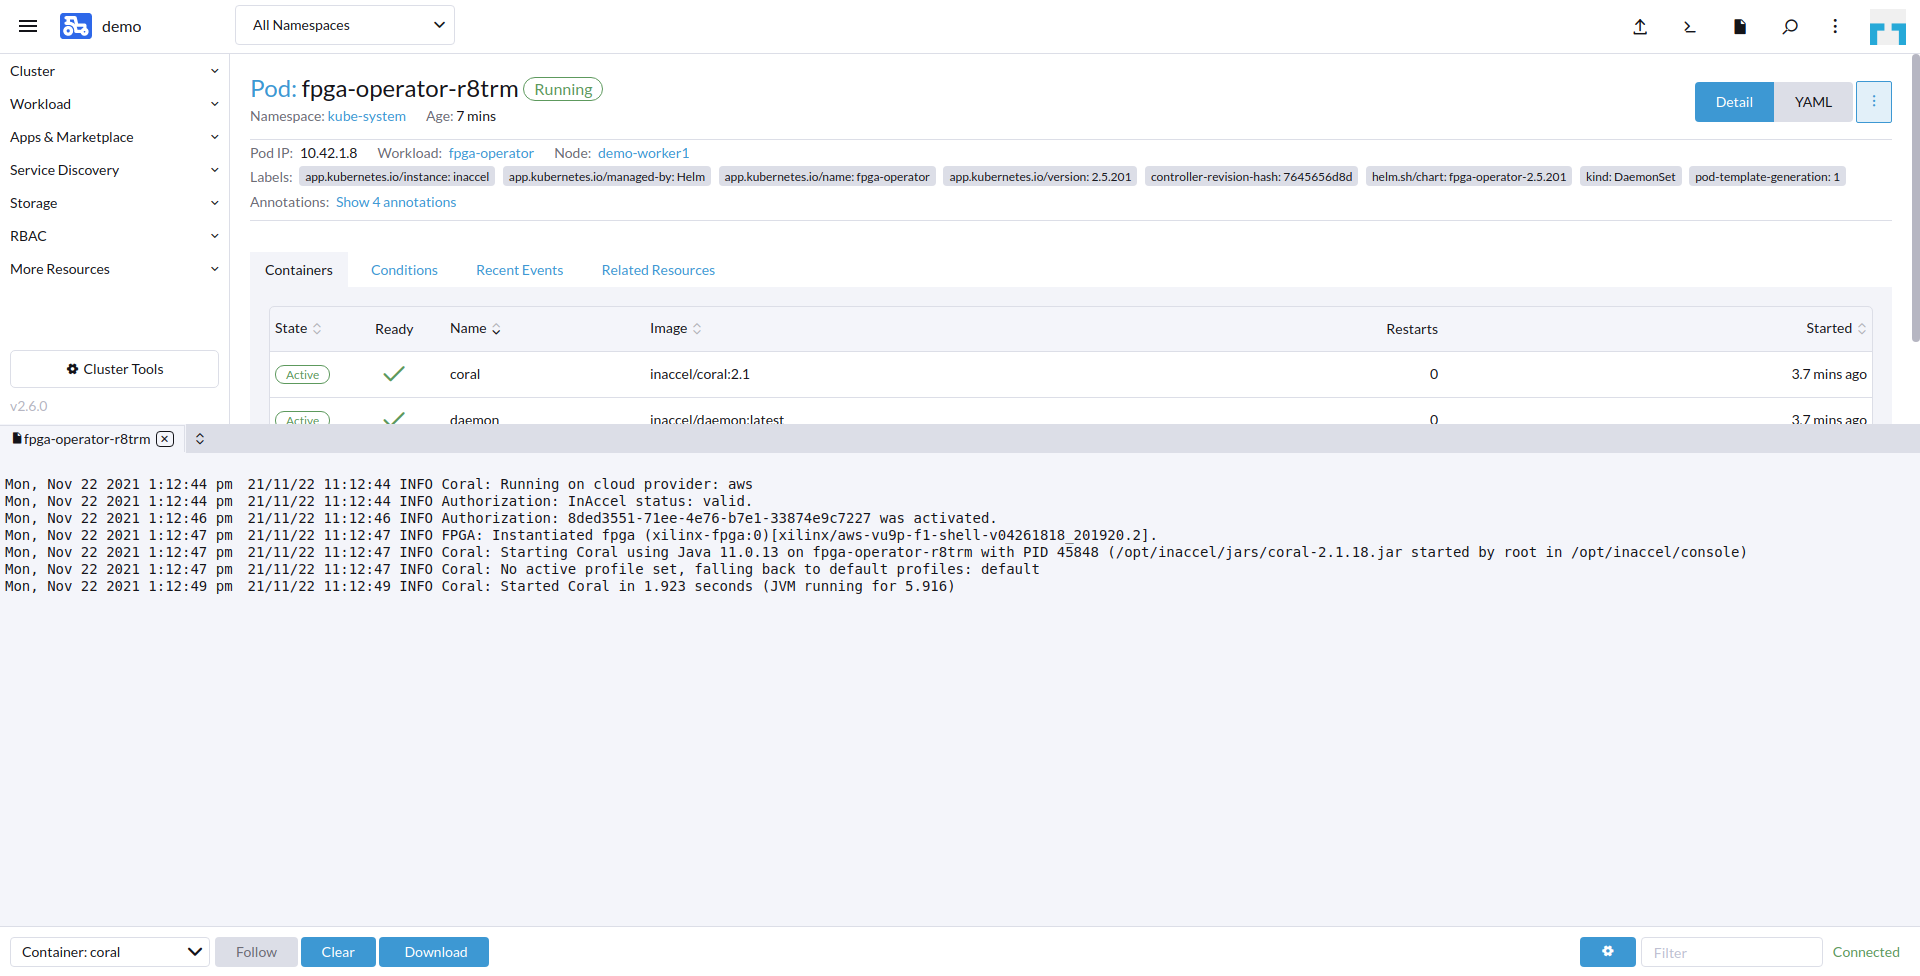
We can also get a more detailed view of the containers inside that pod.
We can further inspect InAccel Coral logs using the three dots right to the DaemonSet pod entry and select View Logs.
Make use of the FPGAs-
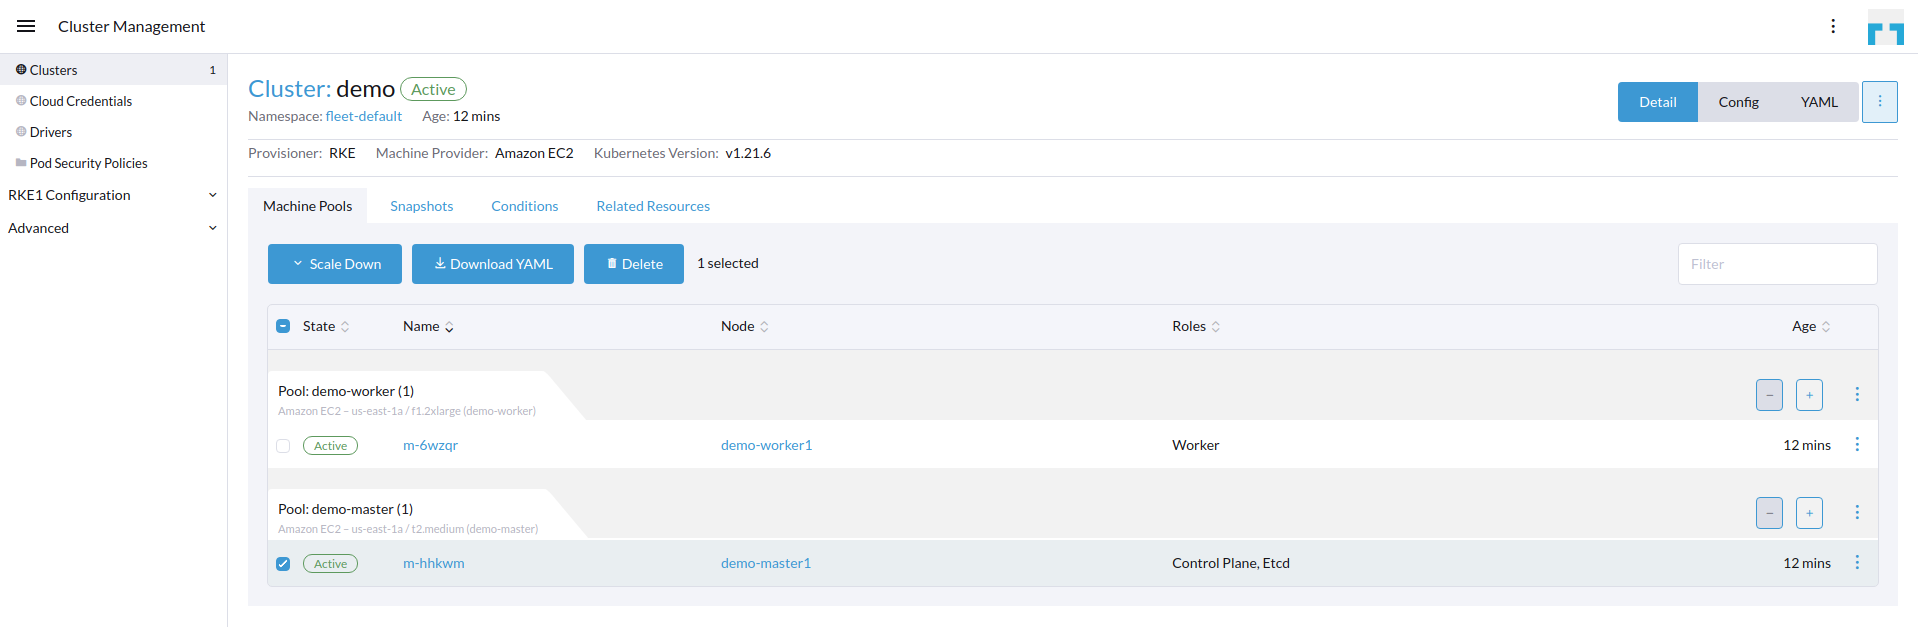
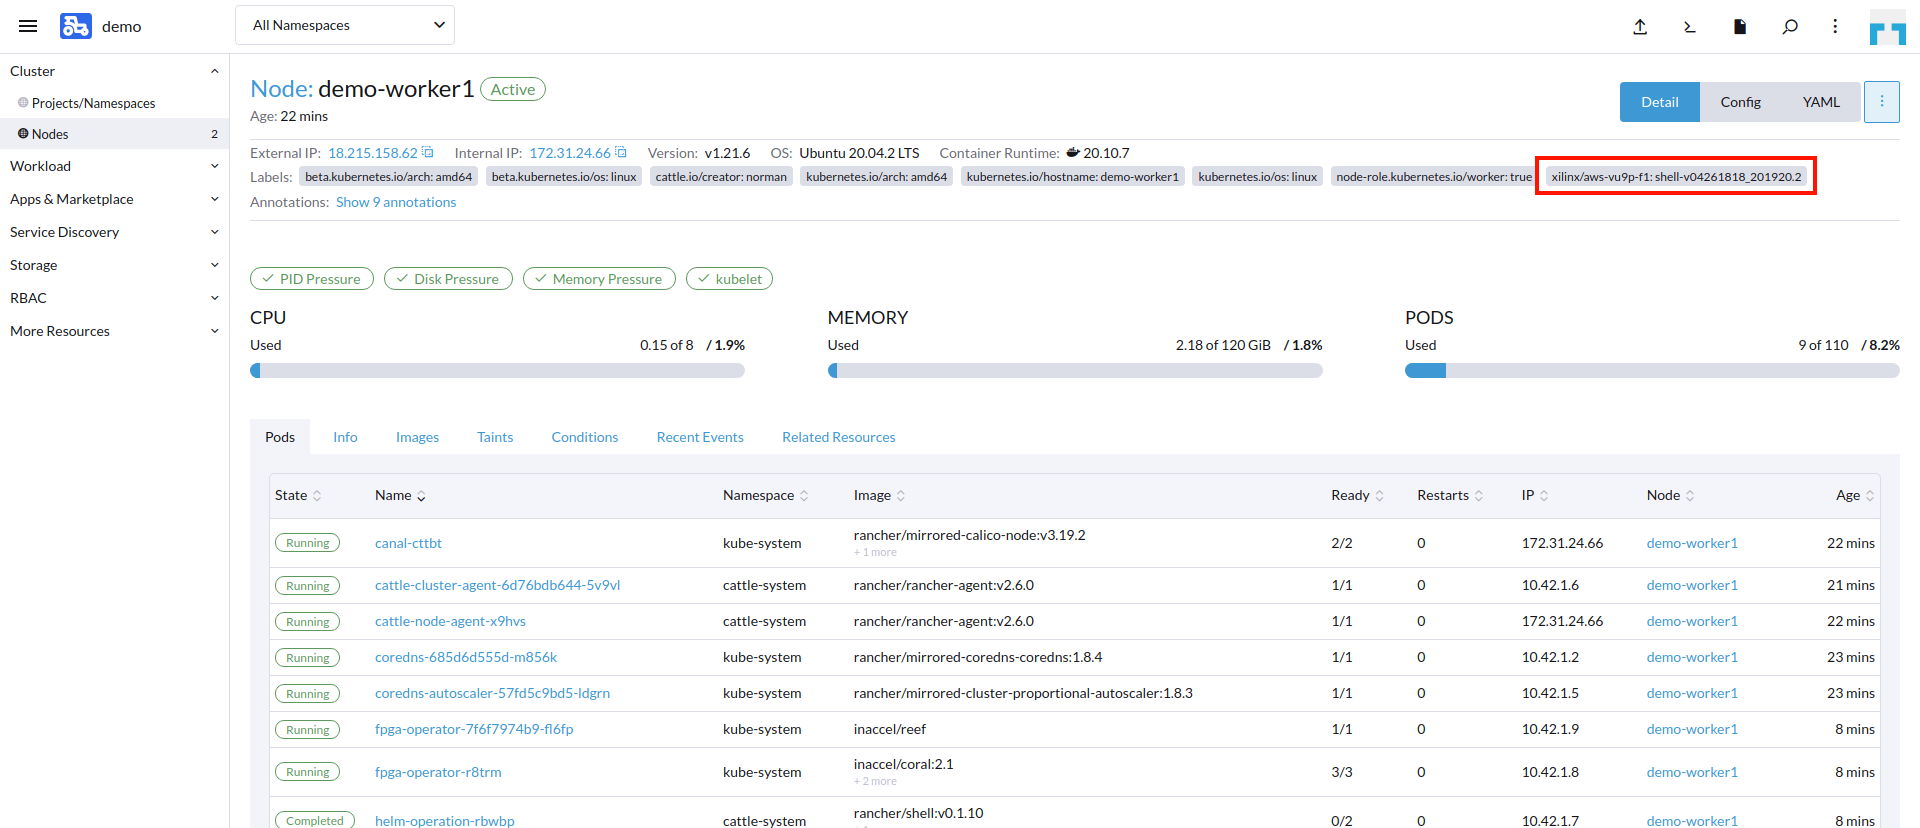
Now that FPGAs are accessible, we can deploy an FPGA-capable workload. We can also verify that this installation was successful by looking at the cluster details in Rancher. We see that the FPGA Operator has kindly labeled our nodes for FPGA usage.
Deploy an FPGA-Capable workload-
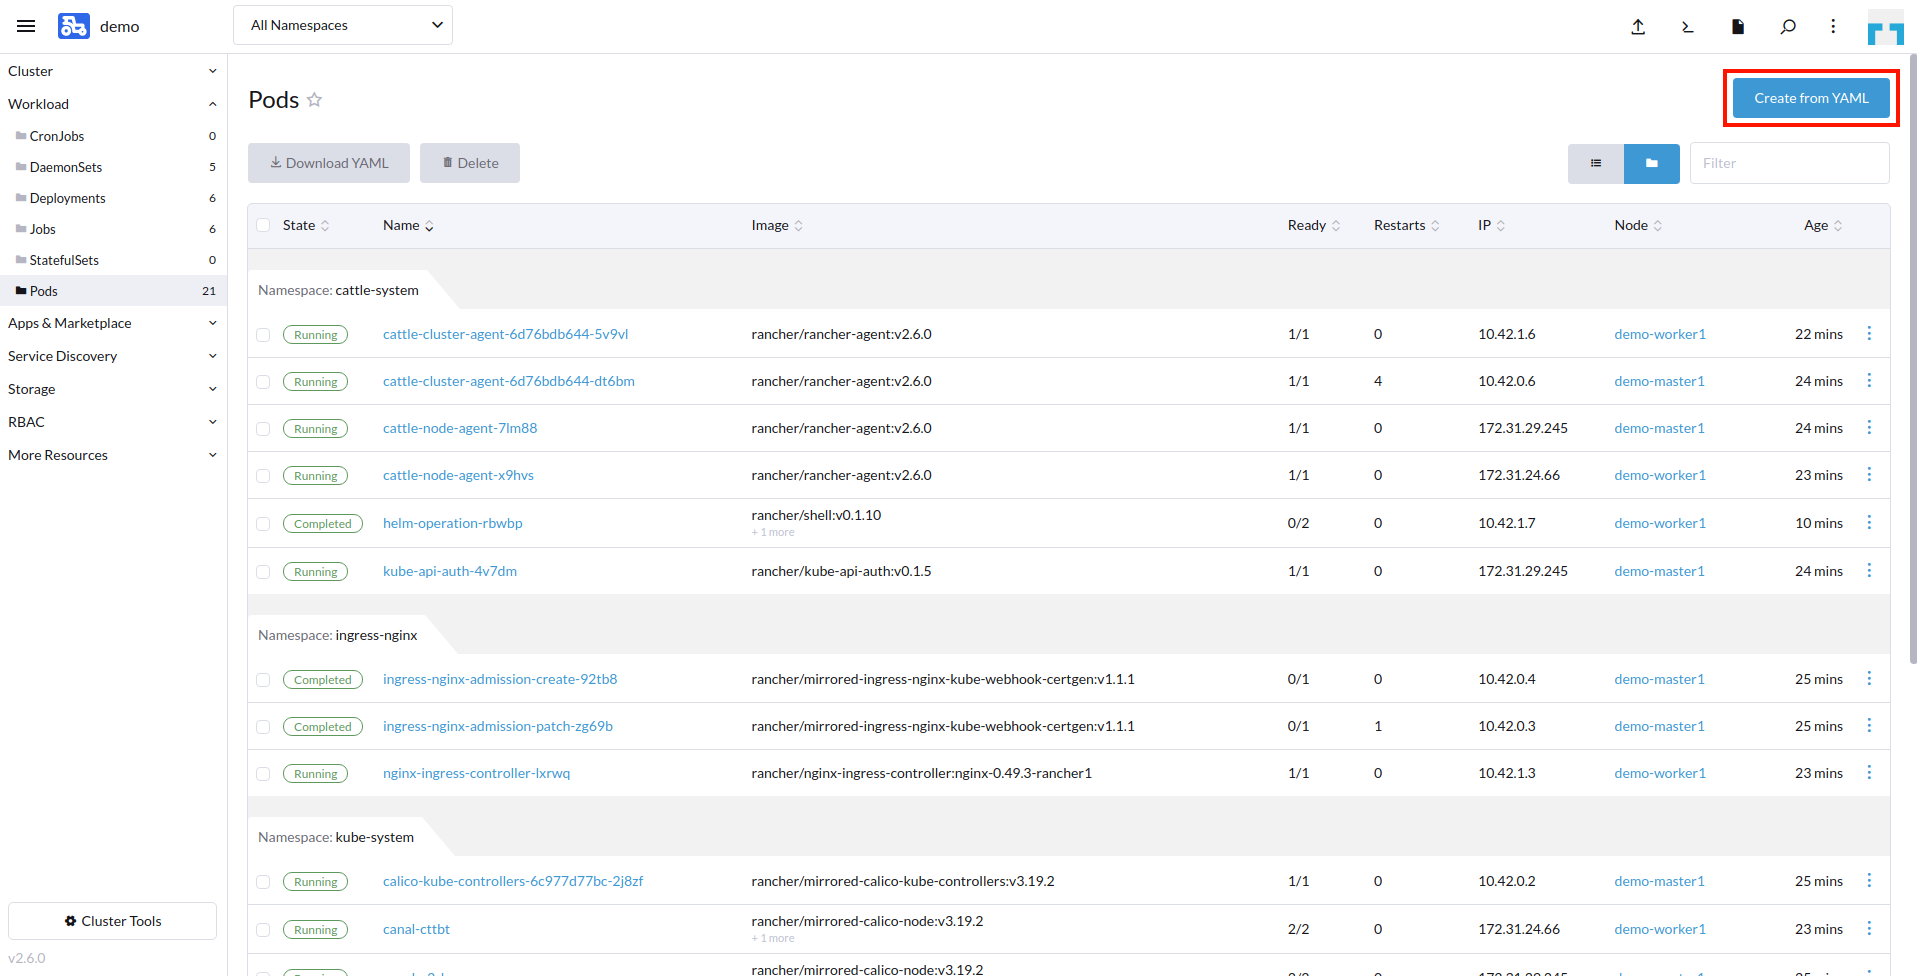
We open the Workload menu and select Pods from the menu column. Then from the right top corner we select Create from YAML.
For this workload, we have already prepared a pod specification (available also on github) that simply invokes a vector addition workload for FPGA acceleration:
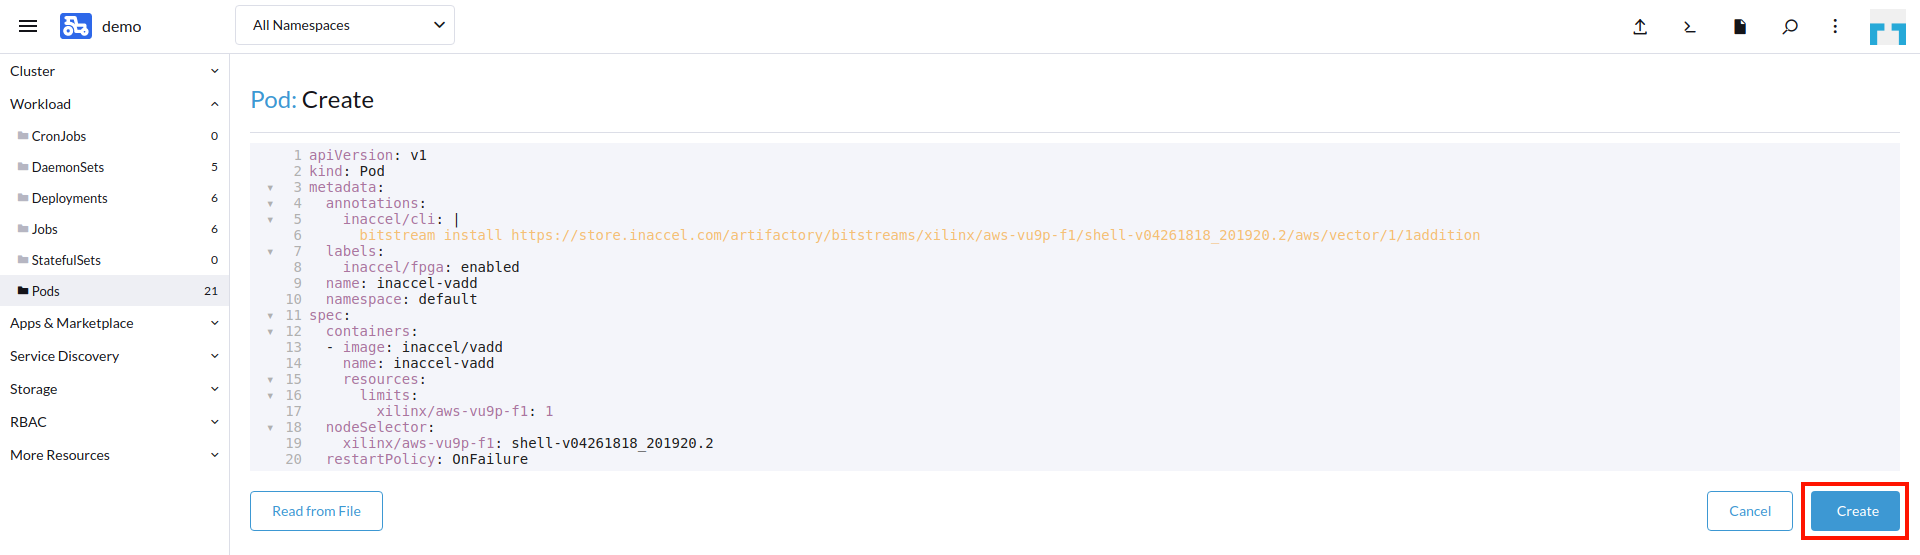
And after a couple of seconds we see that our workload has successfully ran on the FPGA device and returned the correct results (Test PASSED).

Conclusion-
This simplified approach to getting Kubernetes up and running with FPGAs takes advantage of these two things:
- The FPGA Operator from InAccel
- Rancher’s cluster deployment and catalog app integration