Zero to FPGAs using BinderHub
Introduction-
In this article we are going to present the first ever FPGA accelerated execution of Jupyter Notebooks over BinderHub.
BinderHub enables end users to easily create computing environments from Git repos, making it easier than ever to run applications without the need of installing packages, setting up environments etc. It then serves the custom computing environment at a URL which users can access remotely. To achieve this functionality BinderHub uses a JupyterHub running on Kubernetes.
However, this awesome concept misses the ability of running applications in an accelerated environment. And this is where InAccel comes in. InAccel, a world-leader in application acceleration through the use of adaptive acceleration platforms (ACAP, FPGA) provides an FPGA operator that allows instant deployment, scaling and virtualization of FPGAs making the utilization of FPGA clusters easier than ever. InAccel's FPGA Kubernetes device plugin enables users to accelerate their Pods within the snap of a finger. That said it really makes sense to combine all that together to provide seamless acceleration for any computational intensive workload.
Supposedly having already deployed a Kubernetes cluster over a bunch of servers hosting FPGAs and having setup BinderHub you only need to deploy InAccel FPGA Operator to enable FPGA accelerated notebooks:
-
Deploy InAccel FPGA Operator:
helm repo add inaccel https://setup.inaccel.com/helm
helm repo update
helm install my-fpga-operator inaccel/fpga-operator
Hint
If you want to run the enterprise edition of Coral or for example to specify the monitor port, you can do so by setting the corresponding values at the step of installing InAccel FPGA Operator. You can find a list of all the available parameters here. Example:
You can now run any FPGA accelerated application simply by specifying a Git repo in your BinderHub endpoint.
A Use Case Scenario using Amazon EKS-
Amazon offers its so called EKS service for creating Kubernetes clusters. What is more, Amazon's F1 (FPGA) instances are supported by EKS meaning that a user can easily create a Kubernetes cluster hosting F1 instances, to accelerate applications using the power of FPGAs and this is why we are using it in this tutorial.
At this point we are going to guide you through the whole procedure of creating a Kubernetes cluster in Amazon AWS using EKS service and how to further on deploy BinderHub, InAccel FPGA Operator and run an FPGA accelerated application.
Before beginning make sure you have the required access/premissions to perform the actions below using your AWS account. For this guide we used an account with the following policies attached:
-
IAMFullAccess
-
AmazonVPCFullAccess
-
AmazonEKSAdminPolicy
-
AWSCloudFormationFullAccess
-
AmazonEC2FullAccess
Hint
You can change a user's permissions by selecting the IAM service from Amazon AWS Console. Then from Users panel select your user and click on Add permissions. Select Attach existing policies directly and attach the desired policies
-
Install
python3-pip. -
Download and install
eksctl. -
Install and configure
awscli. -
Download and install
kubectl. -
Setup helm3:
-
Create a Kubernetes Cluster in AWS:
At this ponint we create a Kubernetes cluster in AWS named
binderhubthat will by default spawn two worker nodes with the eks default values. -
Create an auto-scaling group of F1 instances:
We set the minimum number of this nodegroup's nodes to zero (0) since we don't want to be charged for the FPGA instances unless a pod is requesting FPGA resources. In such case, an FPGA (F1) node will be automatically spawned and provisioned to handle this acceleration request. To enable this functionality we also have to deploy cluster autoscaler (next step).
eksctl create nodegroup \ --asg-access \ --cluster binderhub \ --managed=false \ --name f1-2xlarge \ --node-labels inaccel/fpga=enabled \ --node-type f1.2xlarge \ --nodes 0 \ --nodes-max 3 \ --nodes-min 0 \ --tags k8s.io/cluster-autoscaler/enabled=true \ --tags k8s.io/cluster-autoscaler/binderhub=owned \ --tags k8s.io/cluster-autoscaler/node-template/label/node.kubernetes.io/instance-type=f1.2xlarge \ --tags k8s.io/cluster-autoscaler/node-template/resources/xilinx/aws-vu9p-f1=1 -
Deploy Kubernetes cluser-autoscaler:
We make sure that the cluster autoscaler points to the correct Kubernetes cluster by specifying the
autoDiscovery.clusterNameandawsRegionproperties. -
Prepare the binderhub deployment:
To deploy Binderhub we have to first create a yaml file that will host all the required configurations. For example, we specify that the pods to be spawned by BinderHub, should be labeled as
inaccel/fpga: "enabled"and should request exactly onexilinx/aws-vu9p-f1FPGA resource.Make sure you replace
docker-id,organization-name,prefixandpasswordwith your own values.config.yamlconfig: BinderHub: use_registry: true image_prefix: <docker-id OR organization-name>/<prefix>- dind: enabled: true jupyterhub: singleuser: profileList: - display_name: "FPGA Server" description: "Spawns a notebook server with access to an FPGA" kubespawner_override: extra_labels: inaccel/fpga: "enabled" extra_resource_limits: xilinx/aws-vu9p-f1: "1" registry: username: <docker-id> password: <password>Hint
Dockerhub registry is used in this example. If you want to connect BinderHub to a different docker registry please consider BinderHub documentation
-
Install BinderHub.
You can modify the
--versionargument as you see fit. You can find a list of all the available versions here. -
Connect BinderHub and JupyterHub.
Hint
If the above command returns
<pending>just wait a few moments and execute it again.Copy the output of the above command and edit
config.yamlfile adding the following:The whole
config.yamlfile should look like this:config.yamlconfig: BinderHub: use_registry: true image_prefix: <docker-id OR organization-name>/<prefix>- hub_url: http://<output-of-the-above-command> dind: enabled: true jupyterhub: singleuser: profileList: - display_name: "FPGA Server" description: "Spawns a notebook server with access to an FPGA" kubespawner_override: extra_labels: inaccel/fpga: "enabled" extra_resource_limits: xilinx/aws-vu9p-f1: "1" registry: username: <docker-id> password: <password> -
Update Binder beployment. If you chose a different
versionwhen installing BinderHub make sure you set the same one here: -
Deploy InAccel FPGA Operator:
-
You are all set! Get BinderHub endpoint and paste it in a web browser.
Hint
Wait a couple of minutes for the DNS record returned in the previous step to be registered and to become fully functional.
Run Xilinx Vitis example applications-
To promote the benefits of Xilinx's Vitis accelerators, we have created several jupyter notebooks that invoke the accelerators and can be instantly spawned using BinderHub. We have modified the Vitis software libraries to use our framework's API and have implemented the corresponding notebooks.
-
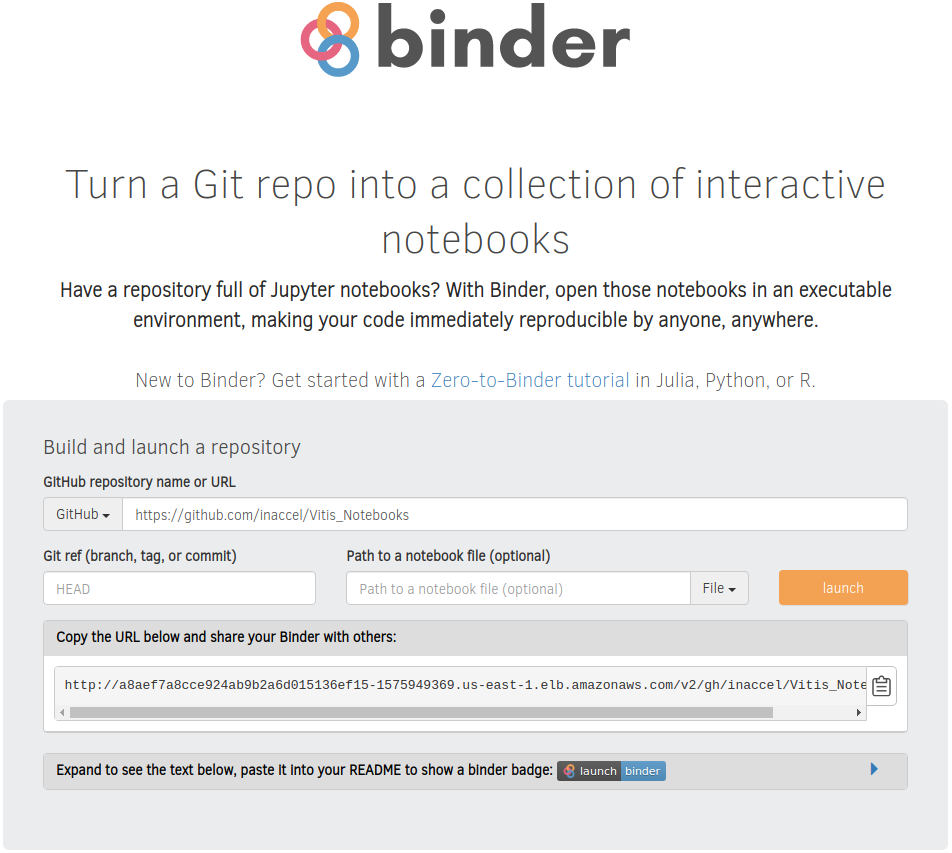
In the BinderHub endpoint you setup previously, paste the following URL and then hit Launch:
You should then see a docker image being built and after a while you should be reirected to a fully working Jupyter Notebook environment.
-
Run any of the notebooks available or create your own.